Sunday, June 7, 2020

A Tiny, Realistic Glance at a Part-time Wannabe Blogger's Life

Well, here we are in 2020, and what a shit show it's been. Not that my past couple of years have been great. It's been a roller coaster of a ride, and 2020 has just been the cherry on top of the shit pile. For those of you who were hoping for a happy update full of positive vibes, or maybe even possibly a sewing project, I'm sorry to say you're out of luck and you may want to click that little x in the corner. It's okay. I won't take it personally.
Let's begin with why I fell off the blogging wagon to begin with. It all began innocently enough with a glass cabinet door crashing down one morning at breakfast as I was getting my youngest a cup (not the orange one mama!) Side note: Does anyone's child actually like the orange cup, or is every house like my house where pink, purple and blue are preferable, red, green and yellow are acceptable, however, never, ever, orange. Any who, I digress. The cabinet door came crashing down on my head, and smashed into smithereens, some of them embedded in my scalp. What a way to start a morning.It was not long after that we, meaning my husband and I, decided that kitchen renovations were in order. Here's what we were working with.

Have any of you renovated a kitchen? No? Lucky you! Yes? Then you feel my pain!We made all the fun decisions regarding cabinets, paint and flooring and proceeded to demo our kitchen. You thought the door crashing was bad? I thought so too, until I began scraping off the painted popcorn ceiling. If you don't know what that is, let me give you a hint, it is NOT as fun as popcorn! Painting a popcorn ceiling causes the popcorn stucco whatever it is to adhere to the ceiling like concrete (don't worry, we tested for asbestos and came back clear!). So i was busting my butt scraping that shit out of there. Also since my husband had to sand off the paper backing that the old linoleum left (it was causing too much unevenness for the click in place flooring we had chosen), we couldn't have the ac on because it would distribute all the dust into the surrounding house that we taped off.


So I was working in a 38℃ (that's 100.4℉ for any American readers) Can you see where this is going? And to top it all off, we ended covering it up anyway because the drywall was far too damaged to continue as is. We decided to put wainscoting on the ceiling, and I have to say I really like how it turned out!


This is just the beginning of the many difficulties we encountered. I won't go too much into detail, but I will say it included an all night painting session. However, here is the un-decorated (because my plate is far too full to deal with that right now) kitchen reveal! Minus the tile back splash, because to be honest we haven't agreed on one yet...


I don't know about anyone else, but renovating and restyling rooms on a middle class budget isn't like renovating and restyling rooms on blogs that I've read. I don't know if they wait until they're entirely finished before they blog, or how they manage to finish a room so quickly, because here I am, two years later finally blogging about it and it's still not officially finished because it's still missing all the decor and some of the furniture.
Oh well, this is real life for me, and I'm sure many others like me. I'm thankful we saved up enough money for the renos, and I'm okay with things constantly being works in progress.
Thanks for checking in, sorry it's not my usual content. I do have some sewing projects to blog about, but I figured I'd catch people up on what's been going on. Maybe you're interested, maybe you're not, but it's what I'm writing anyway. Continuing on the next one is how my husband and I dealt with the burnout we experienced afterward.
Remember, you can follow me on Pinterest, Instagram and Facebook using the social media icons in the top and bottom left hand corners of my blog. Also my Pinterest Board with all my creations can be found in the bar along the right hand side. I love to hear from my readers, so please leave your comments and questions down below! Thanks for stopping in!

Before

After


Thursday, March 8, 2018

Where I've Been, Catching Up, and Birthday Fun


Well, that was a bit of a long break. From everything. For those of you who don't know me, I suffer from depression and anxiety, like many other people. This winter was particularly hard. With stretches of -40*C weather, and many overcast days, it was pretty hard to stay motivated. Include the anniversary of my miscarriage from which I'm still recovering emotionally, and you get conditions that are pretty hard to fight depression and anxiety.
I feel pretty blessed to have such an awesome support team made up of friends and family. My oldest daughters birthday is in January, and it was the perfect opportunity to keep myself busy. She wanted a horse party, so I headed to Pinterest to get some pinspiration. (No apologies for that pun! It was meant to be.)
I wanted very simple party decor, wanting to be able to recycle or reuse everything and stay within my $60 budget. So, here's what I came up with!


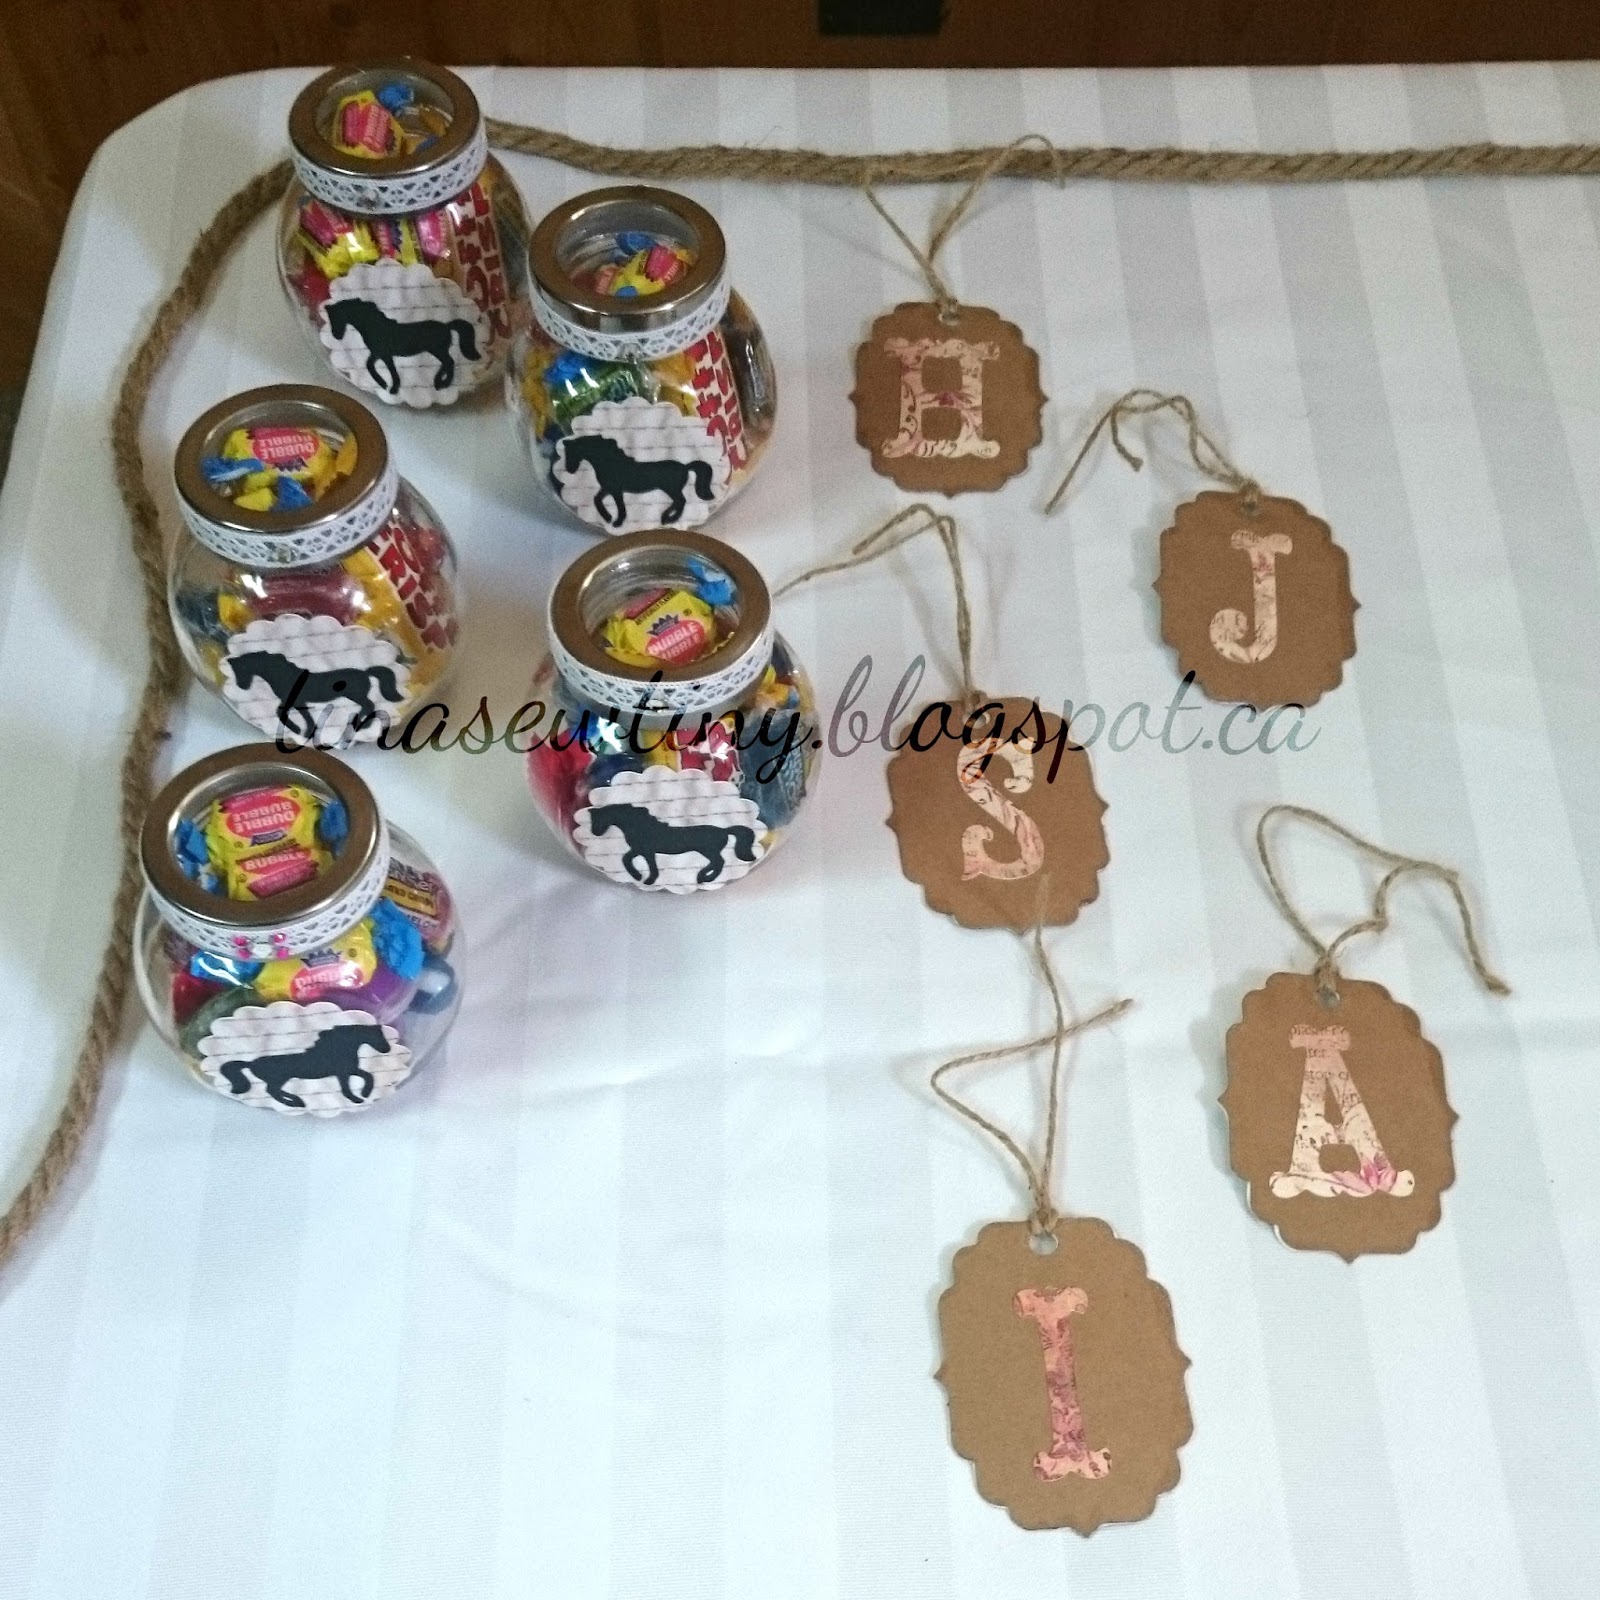
Spice canister treat jars! I picked these up at Dollartree, and they were $2 for a pack of three. I added the decorations with hot glue, so they can be peeled off if they want to reuse the glass jar for something else. Kids are always collecting bits and bobs, and these little jars would hold bead or rock collections nicely.


DIY Horse shoe necklaces as the craft. Honey had a large collection of beads already, so I didn't purchase any for the party. I picked up the elastic thread at walmart. Seriously though, aren't these miniature cast iron horseshoes not the cutest?! I bought them off of ebay, and with shipping, they were about half the budget, but so worth it! These also doubled as a party favor. I'm pretty sure these were everyone's favourite part.


I had a bit of trouble coming up with a horse themed game that I felt confident I could do. I can't draw to save a life, so I wasn't going to attempt  a diy pin the tail on the horse, which was all Pinterest was giving me. I"m not sure how I came up with it, but I figured out a horse race game that was easy to make. I made three different grids on Google spread sheets. The first had the start line, then a blank middle piece, and the last with a finish line. I just printed more middle pieces to get the length i wanted and taped the track together. It could have been prettier, but I just didn't have the time to figure out how to add graphics. It's a dice based game where players roll the dice alternately to see who gets to the finish line first. It wasn't much, but the girls all seemed to enjoy it. In fact, they played it three or four times!


The bookmarks are tags I picked up at Dollar tree, with some twine also from there. I used my Cricut to cut out the girls' first initials to personalize them from paper I already had lying around from my scrap booking phase. Honey put them together, and she loved being involved in the process of decor.


The burlap bags are also from Dollar Tree ( I swear this isn't sponsored in any way! We just don't have a lot of selection of stores where I live.) I didn't know what I would use them for, but Honey loved them, so we got them. We ended up putting the bookmarks and necklaces in them for easy carrying. The treat jars didn't fit, but that was okay. I thought it went well with the rest of the decor.


Here's the final set of the table, I didn't add decor to the rest of the room, but she loved how this looked. I used my Cricut to cut out the signs in the front, and the doily under the cupcake plate. The table cloth and burlap ribbon I had lying around. The rope I picked up at, yep, you guessed it. The Dollar Tree.


Cupcakes! We don't do birthday cakes at our house. My hand eye coordination isn't good enough to decorate a cake, and bought cakes are expensive! Not only can I manage cupcakes, but they're also already serving size. Cupcake toppers are free clip art printed, cut out and attached to toothpicks.

I love being able to make my girls' birthday parties unique and special. Crafting and sewing is not something I grew up with, but something I've been able to explore in my adult years. It's odd how being labeled the logical, book girl, kept me from exploring it sooner. I always thought I didn't have a creative bone in my body. It took jumping into the unknown, and facing the possibility of failure to find out that anyone can be creative. You just have to find the angle that suits you. 

With Spring just around the corner (hopefully, in the Canadian Prairies you never can tell), I can feel my spirits lifting, and I've got a lot of ideas on how to amp up this blog! I can't wait!

Remember, you can follow me on Pinterest, Instagram and Facebook using the social media icons in the top and bottom left hand corners of my blog. Also my Pinterest Board with all my creations can be found in the bar along the right hand side. I love to hear from my readers, so please leave your comments and questions down below! Thanks for stopping in!

Friday, October 6, 2017

Making the Hey June Charleston and using my Ophelia fabric

Summer is gone, and our brief Autumn has arrived bringing with it crisp air, cozy clothes and comfort foods, along with my motivation. I'm really a winter person. Which is a good thing seeing as I live on the Canadian prairies where winter is the prevalent season. I love wearing layers, eating soup and curling up on the couch with a good book and a minky blanket.
September was an unusually busy month, with school starting and canning and such, so I didn't get any sewing done, aside from some mending. I was pretty excited for October to come and bring some more free time, especially now that my two girls are both in school full time.

I have been hoarding some Ophelia fabric from True North fabrics for a while, and was looking for good color blocking patterns so I could stretch the one meter I had as far as I could. I'm pretty frugal in my sewing hobby, and a bit of a minimalist, so my "stash" is really only a collection of about 8-10 meters of fabric, mostly woven, along with a couple of meters of cheap fabrics for muslins.
I also prefer to make clothes that I can carry right through all the seasons, just by adding or removing layers, so I only have a small amount of long sleeve shirts, tank tops, and shorts (two of each to be exact). But really, my wardrobe is really only beginning to take shape. Most of the clothes that are currently in there are in there because I can't walk around naked, lol. I have a select few that are actually part of my capsule, and the rest are just place holders until my nice clothes are finished. They are also clothes I've had for years. I'm not a shopper. Rtw clothes usually fit me horribly.
I bought the Charleston dress from Hey June last month, as my wardrobe was in desperate need of some dresses. I find that the pencil dress shape is one of the most flattering on my shape (in my eyes anyway, lol) and when I discovered that the Charleston had the pencil dress shape included in the pattern I jumped on it. Plus with all the pieces in the bodice and skirt it was perfect for color blocking!
I really enjoyed making the dress, and didn't have a single setback. I made the usual shorten adjustments that I make on all patterns according to the difference in the height that they draft for and my own height. I measured for the large, but when I muslined the top I found that since my fabric had a lot of stretch, I wasn't getting the fit that I was looking for. I sized down to medium and it was perfect. Everything lined up the way it was supposed to, and the drafting is superb. I love how all the piece work in the back gives it just the perfect shaping!

I LOVE the Ophelia fabric. The weight, the colors, everything about it is fabulous! I paired it with some black cotton lycra for a classy but very comfortable dress perfect for Holidays and wearing to church. Or just whenever I want. Which will be often. I need to find another print that I love as much as the Ophelia to make another. Or some fantastic stretch lace, or stretch faux leather.
I still have a decent amount of Ophelia left, and the Hey June Lane raglan has caught my eye. I've been wanting a floral sleeve raglan for awhile now, so it looks like that'll be my next project!
I was lucky to have my friend Jeanine come down to take some photos, but I really need to grab a mirror and practice posing, lol! Don't believe me? Check out this gem, I laughed so hard.

Remember, you can follow me on Pinterest, Instagram and Facebook using the social media icons in the top and bottom left hand corners of my blog. Also my Pinterest Board with all my creations can be found in the bar along the right hand side. I love to hear from my readers, so please leave your comments and questions down below! Thanks for stopping in!

Monday, August 14, 2017

Sis Boom Sally with a high-low a-line skirt hack


I can't believe summer is almost at an end. In a couple of weeks school is starting and I'll suddenly have a lot of interruption-free time on my hands. My youngest is starting grade one, so that means school on a full time schedule. I like to believe that will mean plenty of time for me to sew, but in reality it means I'll be able to catch up on household chores regularly, and MAYBE some more time to sew.

(This one isn't a useful shot, but I loved the lighting.)
This summer has been a very busy one filled with family visiting from out of country, camping trips, my oldest's first trip to Bible Camp, and plenty of afternoons hanging out in our new backyard pool. It's only a pole frame above ground pool, but it's fantastic to be able to swim on a whim. (Yes, I rhymed. Yes, I have to point that out.)
However busy it was, I did manage to sew up a new dress for my Honey Bee. She loves elegant formal wear, and after I sewed up my high low Angie, she was begging for a high low Sally. I had been planning to use the same fabric and make both of my girls matching Mama and Me dresses, but alas, I made a terrible cutting mistake that cost the project. As the fabric was a gift, I wasn't able to get more.
My sis-in-law found some fabric that she liked at a local Marshall's fabrics that she wanted to use to make her daughter a dress, so she bought enough so that the two cousins could have matching outfits. So sweet of her, right? Honey Bee was more than thrilled!

I instantly gravitated to the Sally because always have elastic on hand, but I don't always have the right color zipper, or buttons. And with the closest fabric shop being half an hour drive, I regularly am gravitating towards patterns that don't require these.
The fit is a little loose, because although it's the right size, I forgot to account for the small amount of stretch in the lace and the lining.
As for construction, I just sewed it up using the burrito method of lining, as the lace was dense enough not to see the seam allowance through the lace by the seams. I used a strip of the lining fabric to make a casing all the way around the waist seam, as having elastic just in the back just wasn't enough to pull it in nicely without the side seams shifting towards the back. That's not a problem usually, just with this one since the stretch in  the fabric made it a smidge too roomy.
I used the same method for the skirt that I explain in my blog post about the high low Angie, which you can find here. I did draft the front of the skirt with a shallower curve though, but the process was the same.

I really love that back!
I actually sewed this up right before school ended, so she could wear it for her end of school ceremonies. I've been wanting to get pictures all summer, but a) we had an unusually busy July, and b) I have to catch her on a sunny day, in a willing mood. (In other words, everything in the universe had to line up, lol.) When she is doing of her own accord and not begged or bribed, I get the best pics and we enjoy the process.
Now for a couple of more photos. She did such a good job, I can't help but put in some more good shots she gave me, even if I am an amateur photographer.


Remember, you can follow me on Pinterest, Instagram and Facebook using the social media icons in the top and bottom left hand corners of my blog. Also my Pinterest Board with all my creations can be found in the bar along the right hand side. I love to hear from my readers, so please leave your comments and questions down below! Thanks for stopping in!


Wednesday, July 5, 2017

Up-cycle with Sis Boom, plus a Cathy/Marlo hack tutorial bonus!


I"m so excited to be blogging this week! I have been working on my new sewing space during the last couple of weeks, so I have not been sewing much. I was looking for something to jump start my motivation when I found Sis Boom's Upcycle Challenge blog tour! Sewing, upcycling and blogging all in one. What's not to love?
For the challenge, I wanted to do a pattern I hadn't sewn up before. So I chose the Cathy. And since I love hacking patterns, I decided to add a cute hack and include a tutorial. Note: This hack is done with the Cathy girls pattern also using the Sally girl's pattern, but can be done with the Marlo women's pattern also using the Angie women's pattern.
I've been seeing tops with a circle yoke everywhere, and thought the Cathy would be perfect to hack into one.
Let's begin with the before shot of the maternity shirt from my box of maternity clothes that I doubt I'll ever use again. (Please excuse the poor photo, I neglected to check the photo thoroughly before cutting into it.)
The fabric is a stable knit, with a pretty border print. I love the fabric, and although I could wear it as a non maternity top, I really disliked the fit. When this challenge came up it was the first top that came to mind. I had to do some piecing for the inner yoke pieces, but you don't see them anyway.

 The crop top part was total miscalculation, but they're so in right now, so it ended up being a win!
I love that I was able to use the Sally pattern to save myself all the hassle of drafting a yoke from scratch. Although the tutorial seems lengthy, it actually took me less than an hour to sew up the top, not including the muslin, which was only necessary for tutorial purposes.

TUTORIAL
Before I begin the tutorial, I should say that all the tutorial photos are done with the muslin, and I wasn't particular with stitching, pressing, or finishing seams. The muslin just photographed much better than black fabric and black thread.
 So for this top, I wanted a circle yoke, with a center gather on the front and back. The first thing I did, was grab the Sis Boom Sally front bodice piece. I used this to create my circle yoke by measuring the strap width, and continuing that width down along the neckline as shown in the following pictures.


This created my yoke pattern piece. I made sure to mark where it should line up with the fold, so as to not get mixed up with which side was the center front and which was the shoulder seam.
Cut out four yoke pieces. Be sure to baste the shoulder seams of two yoke pieces together and fit over model's head to make sure you'll be able to get the top on.

This next step is important. I print up the Cathy and tape together. DO NOT select the length at this time, as the pattern piece will get modified. (I did, and got a crop top. But you should wait.)
Since the top of the Cathy bodice piece lines up with the neckline originally, and now you want it to line up with the bottom of the yoke, remove the width measurement of the yoke from the top of the bodice piece, as shown. In my case (size 7) it was 2.5 inches. Then select the length from available cutting lines, but either add the 2.5 inches onto desired finished length, or choose a slightly longer finished length than what you want. Cut out two from your fabric.


This part requires a little playing around, but here's what I did. I pinned out some of the width in the center front causing a pleat. Then I laid the yoke on my daughter, and lined up the bodice against it, slightly overlapping to include seam allowance. This allowed me to see how the coverage was. If I wasn't satisfied, I moved the pin until I was.


Lay the bodice down, with pleat still in place and measure along the top of the bodice. Mine was 10 inches. You'll want to gather the top of the bodice until it reaches this measurement. I chose to gather only the center of the bodice, but you can gather along the entire length if you want. As long as the measurement after gathering is the same. A pleat or a couple of pleats would also work.


Once you've got your four yoke pieces cut out, your two bodice pieces cut out, and your gathering or pleating finished, you can proceed to follow the pattern steps on pages 10, 11 and 12.

Once you're done those steps, take one of the yoke pieces, and place it upside down, right sides together on the bodice piece.


Beginning in the center, pin the yoke to the bodice working your way out on each side. (Similar to pining in a sleeve.) Sew it in place and clip curves. Repeat for the back. Press seams.


Turn the top inside out, place shoulder seams right sides together and sew. Finish seams and press.

Take the other two yoke pieces and sew them together at the shoulder seams, right sides together. Finish and press seams.

Lay the top down right side out so that the circle yoke is spread out. Lay the other circle yoke down on top of it, right side down, so that right sides are together.


Sew along the inner neckline. Clip the curves, turn to the inside and press.

The next part is a bit tricky. You have to go along the entire outside of the folding under the yoke edge and pinning. On the shoulders you'll be folding in both inside and outside yoke layers, while along the bodice you'll only be folding under the inside yoke edge, and pinning, making sure to cover the outer yoke/bodice seam. Once it's all pinned, edge stitch along the entire outside of the yoke edge to enclose all seams and raw edges.


Finally, all you have to do is hem and you're done!

With the cost of knits being so high in Canada, upcycling is definitely worth it when sewing for the kiddos. I just can't justify spending so much on an article of clothing that they will outgrow as quickly as they do. Especially if you're stuck sewing on a petty small budget.

Remember, you can follow me on Pinterest, Instagram and Facebook using the social media icons in the top and bottom left hand corners of my blog. Also my Pinterest Board with all my creations can be found in the bar along the right hand side. I love to hear from my readers, so please leave your comments and questions down below! Thanks for stopping in!