Showing posts with label Tutorial. Show all posts

Wednesday, July 5, 2017

Up-cycle with Sis Boom, plus a Cathy/Marlo hack tutorial bonus!


I"m so excited to be blogging this week! I have been working on my new sewing space during the last couple of weeks, so I have not been sewing much. I was looking for something to jump start my motivation when I found Sis Boom's Upcycle Challenge blog tour! Sewing, upcycling and blogging all in one. What's not to love?
For the challenge, I wanted to do a pattern I hadn't sewn up before. So I chose the Cathy. And since I love hacking patterns, I decided to add a cute hack and include a tutorial. Note: This hack is done with the Cathy girls pattern also using the Sally girl's pattern, but can be done with the Marlo women's pattern also using the Angie women's pattern.
I've been seeing tops with a circle yoke everywhere, and thought the Cathy would be perfect to hack into one.
Let's begin with the before shot of the maternity shirt from my box of maternity clothes that I doubt I'll ever use again. (Please excuse the poor photo, I neglected to check the photo thoroughly before cutting into it.)
The fabric is a stable knit, with a pretty border print. I love the fabric, and although I could wear it as a non maternity top, I really disliked the fit. When this challenge came up it was the first top that came to mind. I had to do some piecing for the inner yoke pieces, but you don't see them anyway.

 The crop top part was total miscalculation, but they're so in right now, so it ended up being a win!
I love that I was able to use the Sally pattern to save myself all the hassle of drafting a yoke from scratch. Although the tutorial seems lengthy, it actually took me less than an hour to sew up the top, not including the muslin, which was only necessary for tutorial purposes.

TUTORIAL
Before I begin the tutorial, I should say that all the tutorial photos are done with the muslin, and I wasn't particular with stitching, pressing, or finishing seams. The muslin just photographed much better than black fabric and black thread.
 So for this top, I wanted a circle yoke, with a center gather on the front and back. The first thing I did, was grab the Sis Boom Sally front bodice piece. I used this to create my circle yoke by measuring the strap width, and continuing that width down along the neckline as shown in the following pictures.


This created my yoke pattern piece. I made sure to mark where it should line up with the fold, so as to not get mixed up with which side was the center front and which was the shoulder seam.
Cut out four yoke pieces. Be sure to baste the shoulder seams of two yoke pieces together and fit over model's head to make sure you'll be able to get the top on.

This next step is important. I print up the Cathy and tape together. DO NOT select the length at this time, as the pattern piece will get modified. (I did, and got a crop top. But you should wait.)
Since the top of the Cathy bodice piece lines up with the neckline originally, and now you want it to line up with the bottom of the yoke, remove the width measurement of the yoke from the top of the bodice piece, as shown. In my case (size 7) it was 2.5 inches. Then select the length from available cutting lines, but either add the 2.5 inches onto desired finished length, or choose a slightly longer finished length than what you want. Cut out two from your fabric.


This part requires a little playing around, but here's what I did. I pinned out some of the width in the center front causing a pleat. Then I laid the yoke on my daughter, and lined up the bodice against it, slightly overlapping to include seam allowance. This allowed me to see how the coverage was. If I wasn't satisfied, I moved the pin until I was.


Lay the bodice down, with pleat still in place and measure along the top of the bodice. Mine was 10 inches. You'll want to gather the top of the bodice until it reaches this measurement. I chose to gather only the center of the bodice, but you can gather along the entire length if you want. As long as the measurement after gathering is the same. A pleat or a couple of pleats would also work.


Once you've got your four yoke pieces cut out, your two bodice pieces cut out, and your gathering or pleating finished, you can proceed to follow the pattern steps on pages 10, 11 and 12.

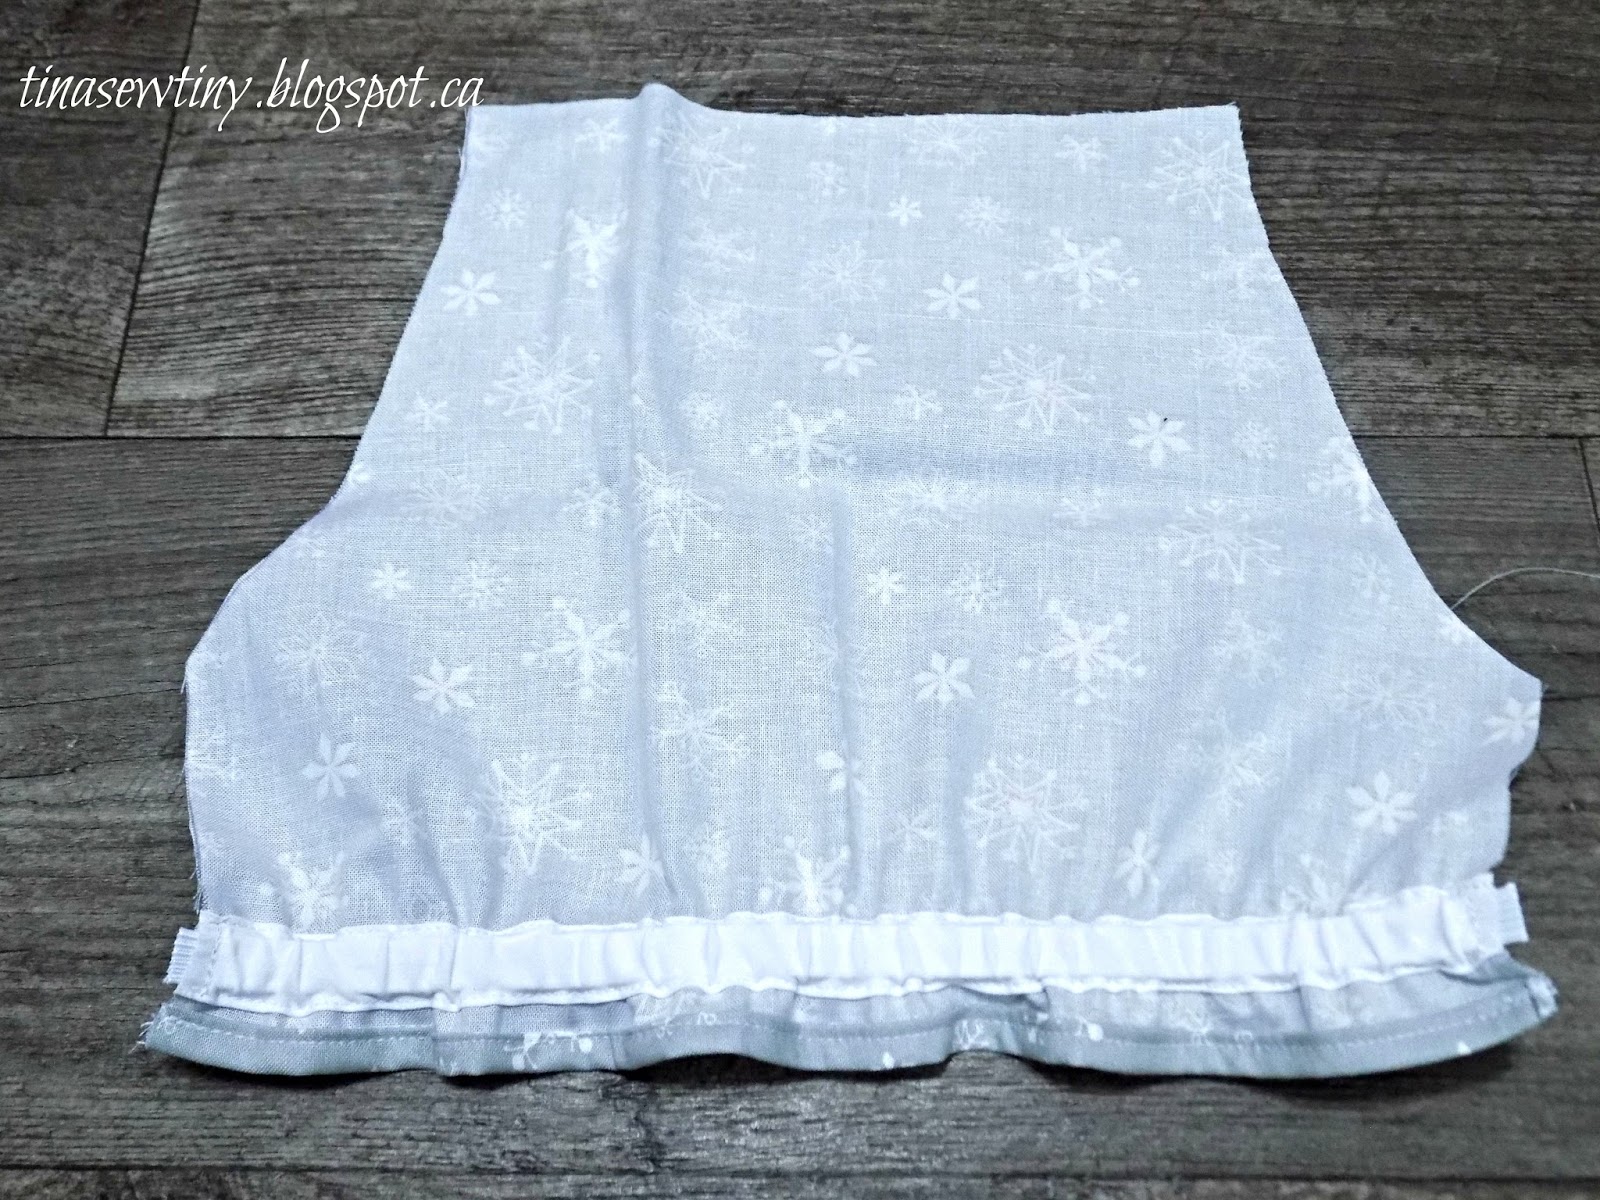
Once you're done those steps, take one of the yoke pieces, and place it upside down, right sides together on the bodice piece.


Beginning in the center, pin the yoke to the bodice working your way out on each side. (Similar to pining in a sleeve.) Sew it in place and clip curves. Repeat for the back. Press seams.


Turn the top inside out, place shoulder seams right sides together and sew. Finish seams and press.

Take the other two yoke pieces and sew them together at the shoulder seams, right sides together. Finish and press seams.

Lay the top down right side out so that the circle yoke is spread out. Lay the other circle yoke down on top of it, right side down, so that right sides are together.


Sew along the inner neckline. Clip the curves, turn to the inside and press.

The next part is a bit tricky. You have to go along the entire outside of the folding under the yoke edge and pinning. On the shoulders you'll be folding in both inside and outside yoke layers, while along the bodice you'll only be folding under the inside yoke edge, and pinning, making sure to cover the outer yoke/bodice seam. Once it's all pinned, edge stitch along the entire outside of the yoke edge to enclose all seams and raw edges.


Finally, all you have to do is hem and you're done!

With the cost of knits being so high in Canada, upcycling is definitely worth it when sewing for the kiddos. I just can't justify spending so much on an article of clothing that they will outgrow as quickly as they do. Especially if you're stuck sewing on a petty small budget.

Remember, you can follow me on Pinterest, Instagram and Facebook using the social media icons in the top and bottom left hand corners of my blog. Also my Pinterest Board with all my creations can be found in the bar along the right hand side. I love to hear from my readers, so please leave your comments and questions down below! Thanks for stopping in!


Tuesday, March 21, 2017

High Low Knit dress, featuring the Sis Boom Angie


Hello peoples, welcome back to my blog! I'm the second stop on the Sis Boom Angie Pattern Hack-A-Thon and I can't wait to show you how I've hacked my Angie! Above is the original version of the dress. The pattern is drafted for woven, has bust and back waist darts, elastic back waist, and gathered skirt. Here is how I hacked mine, plus a mini tutorial!
(Frigid outdoor pics, hence the face, the wind was soo cold! I ended up taking my shoot inside with a tablecloth backdrop.)

 I measure at the end of a medium, or beginning of large, so I went with medium. Since I was doing mine in knit with a good amount of stretch, I ended up taking in the final dress, and could have probably gone with a small. The fabric I chose was a meter of grey cotton Lycra that I ordered from True North Fabrics, and two meters of stripe poly blend that I got from my sis-in-law for Christmas (I love when she draws my name for secret Santa!).
I made the bodice as per pattern with only three small changes. First, I shortened it by a couple of inches, so that it would hit my higher natural waist. I wasn't sure how my proportions would end up, considering I have a short waist, but long torso but I think it looks well balanced. Higher waist, but not empire, lol.
Second, I didn't add elastic in the back (since it was knit and I took it in it was fitted enough without it), and, third, I went with knit bands for the neckline and armscye finishes.

Here are the instructions to do the knit bands. Begin by sewing up your bodice as per pattern, and make any fit adjustments. Then measure the total circumference of the neckline, and armholes. The band length for the fabric I was working with (cotton Lycra) was 80% of the circumference measurements and I cut them two inches wide. Then I attached them like I normally would in a regular knit pattern.
For the skirt, I drafted my own high-low skirt. Since I have high hips and a fairly pronounced spoon shape, I decided I didn't want any gathers or pleats at the waist seam. So I went with a somewhat a-line shape.
 I began with measuring the width of the front of the finished bodice, from side seam to side seam, and added half and inch seam allowance. I then measured how wide I wanted the skirt to be. Next I measured from my natural waist to how long I wanted the skirt to be. I repeated the measurements with the back.
Since I don't own a french curve yet, I searched my kitchen for a bowl lid with a curve large enough to my liking and used that to get nice curves at the bottom left and top right of the hem line, but free handed the middle. If your're good at free handing you could free hand it all, but I'm not.
Here are my finished pattern pieces. See how the curves match up when I line up the side seams?

I then cut each piece on fold, remember that for the back the long side lines up with the fold, and for the front the short side does.

After that I just sewed up the skirt right sides together at the side seams, and attached it to the bodice right sides together. Finally, I used my serger to do a narrow rolled hem. This is only my second time doing the rolled hem, and I obviously need practice, but i don't mind the waviness. I chose to wear mine with a belt. Since I used two different fabrics, it just seemed to want a pretty belt. And of course some pretty heels! 
I probably won't wear the three inch heels very often, but this dress will get so much wear as it gets warmer! I even happen have a cardi that matches the darker grey stripes perfectly! Also, I've got enough fabric left over to make my girls matching Sallys, although theirs won't be high-low. All from one meter of cotton Lycra, and two meters of the stripe poly blend. I happen to love being matchy matchy for holidays, and Easter is right around the corner!
I can't wait to see all the other hacks in the tour, because who doesn't like being able to get more out of their patterns, right? This dress is perfect for hacks, no zipper or buttons to worry about, but you still get a great fit. Remember to check in the Sis Boom Pattern Co Facebook group for the next stops on the tour!
Remember, you can follow me on Pinterest, Instagram and Facebook using the social media icons in the top and bottom left hand corners of my blog. Also my Pinterest Board with all my creations can be found in the bar along the right hand side. If you're looking to purchase or order something from my shop, you can contact me on my page. That's Sweet Stitch Shoppe. I love to hear from my readers, so please leave your comments and questions down below! Thanks for stopping in!


Tuesday, February 28, 2017

Flutter Sleeve Hack for the P4P LMU

If you've been around for awhile, you probably know that January and February are particularly difficult months for me. Well, February is over, and I'm excited that things are on the upswing. Hopefully more sunshine will come in the coming weeks of March. I can already feel my moods and motivation perking up.
In a rare burst of motivation I came up with some ideas for regular posts. The first one will be a pattern hack, variation or mashup on patterns that I currently own. I"m hoping to post bi-weekly (I say hoping, because I'm horrible at keeping schedules set by myself). These posts will feature patterns of various indie designers, and tutorials on how to change up their look. 
The second monthly post will be an up-cycle post using patterns that I own. I'll be digging through my closet, my husbands closet, and thrift stores, to find items that have unique features or fabric to up-cycle into something wearable for either my daughters or myself.
I"m really hoping to revamp my blog this year, and take it more seriously. Other posts that will be posted in between will include pattern reviews of any new patterns I've purchased, and posts on fitting a petite, short waist-long torso (meaning high hips), spoon body shape. I've noticed there isn't many bloggers with that body shape, but there seem to be a lot of sewists that identify with it.
If there's something specific that you'd like to see, and haven't found it elsewhere (or it hasn't been satisfactory elsewhere) just let me know, and I'll see if I can address it.
Now that I've babbled for awhile, onto the post of this week! I've had the Layer Me Up from Patterns for Pirates for a while, and I really like it, but I had an idea of dressing it up a bit by making the sleeve with more drape, and making it in a poly-lycra. I had a meter of black and white polka dot poly-lycra that I felt was a perfect fit. If you don't have this pattern, but have one similar it should work, although the sleeve might look slightly different. When in doubt, MUSLIN!

I began first with making prepping my sleeve pattern. I already had the shirt printed, and taped. I also had already made my fit modifications to it, shortening the armscye and sleeve cap to fit my petite upper body.
I traced around the sleeve pattern onto some heavy duty freezer paper, and shortened the sleeve to one inch long along the seam. To make it a flutter sleeve, instead of fitted, I needed to add some fullness. I did this using the slash and spread method. I drew the cut lines one inch apart, beginning from the center fold. I cut along each line, starting at the bottom of the sleeve, but only cutting up to the seam allowance, which I had measured and marked. 
Then I got a fresh piece of freezer paper, and lined up edge sleeve with the edge of the paper, shifting the sleeve so that the top corner touched the edge of the freezer paper, and the bottom corner is half an inch away. Then just shift each piece so that there is a half inch gap at between bottom corners.
Your final sleeve piece should look like this. 

I measured the the length of the sleeve cap along the curved edge from the center to the bottom of the curve, and my modified sleeve was 1/4 inch longer, so I just shaved that off from the center. If you want more fullness, just spread the pieces further apart, and remember to take off any extra length on the sleeve cap from the center.


That's all there is too it. Now just sew up as per pattern. I choose not to hem my sleeves, mostly because my serger wouldn't cooperate on a rolled hem, but you can hem them however you prefer to hem curved edges.
I'm really happy with how it turned out, and I can't wait to come up with more hacks for this pattern and other patterns that I own.


Remember, you can follow me on Pinterest, Instagram and Facebook using the social media icons in the top and bottom left hand corners of my blog. Also my Pinterest Board with all my creations can be found in the bar along the right hand side. If you're looking to purchase or order something from my shop, you can contact me on my page. That's Sweet Stitch Shoppe. I love to hear from my readers, so please leave your comments and questions down below! Thanks for stopping in!

Wednesday, August 24, 2016

At School and Play; a Sis Boom Blog Tour


September is just a few short weeks away, and for us up here in Canada, it means the beginning of school! I'm thrilled (and a little nervous, I'll admit) to be a part of Sis Boom's At School and At Play blog tour. 
Keep reading to the end of the post, as there's a giveaway!
The Sis Boom Leighanna is one of my favourites for several reasons. First, no closures. Second, easy fit. Third, can be sewn in woven OR knit. Finally, it's a really fast sew. This one only took an hour and a half, and that is from cut until finish, plus I forgot to stop the timer when I paused to pull out my eldest's tooth. I had the timer going, because I'm horrible at estimating time. Anyone else?
One thing I did differently this time around, is add elastic to the short sleeves. It is in the pattern, but I've never done it before because both of my girls HATE exposed elastic. So, I decided to add a casing, and include a mini tutorial for you in case you'd like to do the same!
Begin by following the pattern directions until the step where you iron the hem of the sleeves on page 12. Press the sleeve hem as directed, and proceed to the step where it tells you to draw the line with disappearing marker or chalk. Here's where it changes a little.
The pattern tells you to measure up 1 inch above the hem line and draw a parallel line across the sleeve on the wrong side. Instead, measure up 1 1/4 inch, and draw the line. Next, cut two pieces of single fold bias tape the same length as the width of the sleeve. Have double fold but not single fold? No worries, just press it open with an iron, voila, single fold bias tape (that's what I did). Since I used 1/2 inch elastic, I just made sure my bias tape was just a bit wider. If using 1/4 inch elastic, you'll want bias tape that is about 1/2 an inch wide.
Line the bias tape up with the line you drew, between the hem and the line, and edge stitch along the edge of the tape all the way along. Do the same to the other side of the bias tape. Repeat on other sleeve.
Use a safety pin or bodkin to feed the elastic into the casing slowly. Once you've got the end lined up like in the picture, stop. If the end comes into the casing, just feed it all the way through, pull it out and try again. Then stitch down the end, within the seam allowance. I like to give it a couple of runs back and forth, to make sure it's tacked down good.


Then, feed the bodkin/safety pin out the other end and tack that end down the same way. It should look like this.
 

Repeat with the other sleeve, and follow the rest of the directions on the pattern and you're done!
I love how the sleeves look with the little gather, and now my little is actually happy wearing it!
You can get any of the Sis Boom patterns in their shop or their etsy shop and they're on sale RIGHT NOW for 40% off until September 4th using the code BACK2SCHOOL! They've also got a sew-along happening in their Facebook group if you want to join in. Any back to school Sis Boom sews that are sewn between August 1 and September 10 can be entered into the album here. Three winners will be chosen and awarded pattern of choice!
And now for the blog giveaway! Comment below your favourite thing to do in free time (when you aren't sewing) for a chance to win a free copy of the Leighanna pattern. Don't forget to check below for more blog posts with giveaways!
***Edit to Add: This giveaway is closed. ***
Welcome to the Sis Boom Blog tour!

We are excitied to announce that our bloggers EACH have a pattern giveaway on their posts! Everyday something new; so be sure to follow along with this tour!

August 22 Paisley Roots / August 23 Cookies n' Bees  /  August 24 Tina Sew Tiny  /  August 25 Screeching Dinosaur  /  August 26 PearBerry Lane  /  August 29 Troosp To Tots  /  August 30 A Crazy Craft Lady  /  August 31 Glitter in My Coffee  /  September 1 Sunflower Seams  /  September 2 Adventures with Bubba and Bug