Tuesday, December 6, 2016

Snow day means sew day!

Oh the weather outside is frightful... Let me sew, let me sew, let me sew!
Somehow the camera just doesn't pick up all the blowing snow, but it really is a blizzard out there. School was canceled, which is a pretty rare occurrence. We're usually expected to figure things out, but this one was bad enough, I guess. Even the banks in our area put out a notice saying they were closed, which has never happened before in my recollection! Hubs still went to work, but he sent an email saying it was really slow going, and to stay put. Here's hoping he'll make it back home all right.
My girls were really happy about having a snow day, especially my eldest, who is always going on about how little time she gets at home. As in to the point where we're considering homeschooling for her.
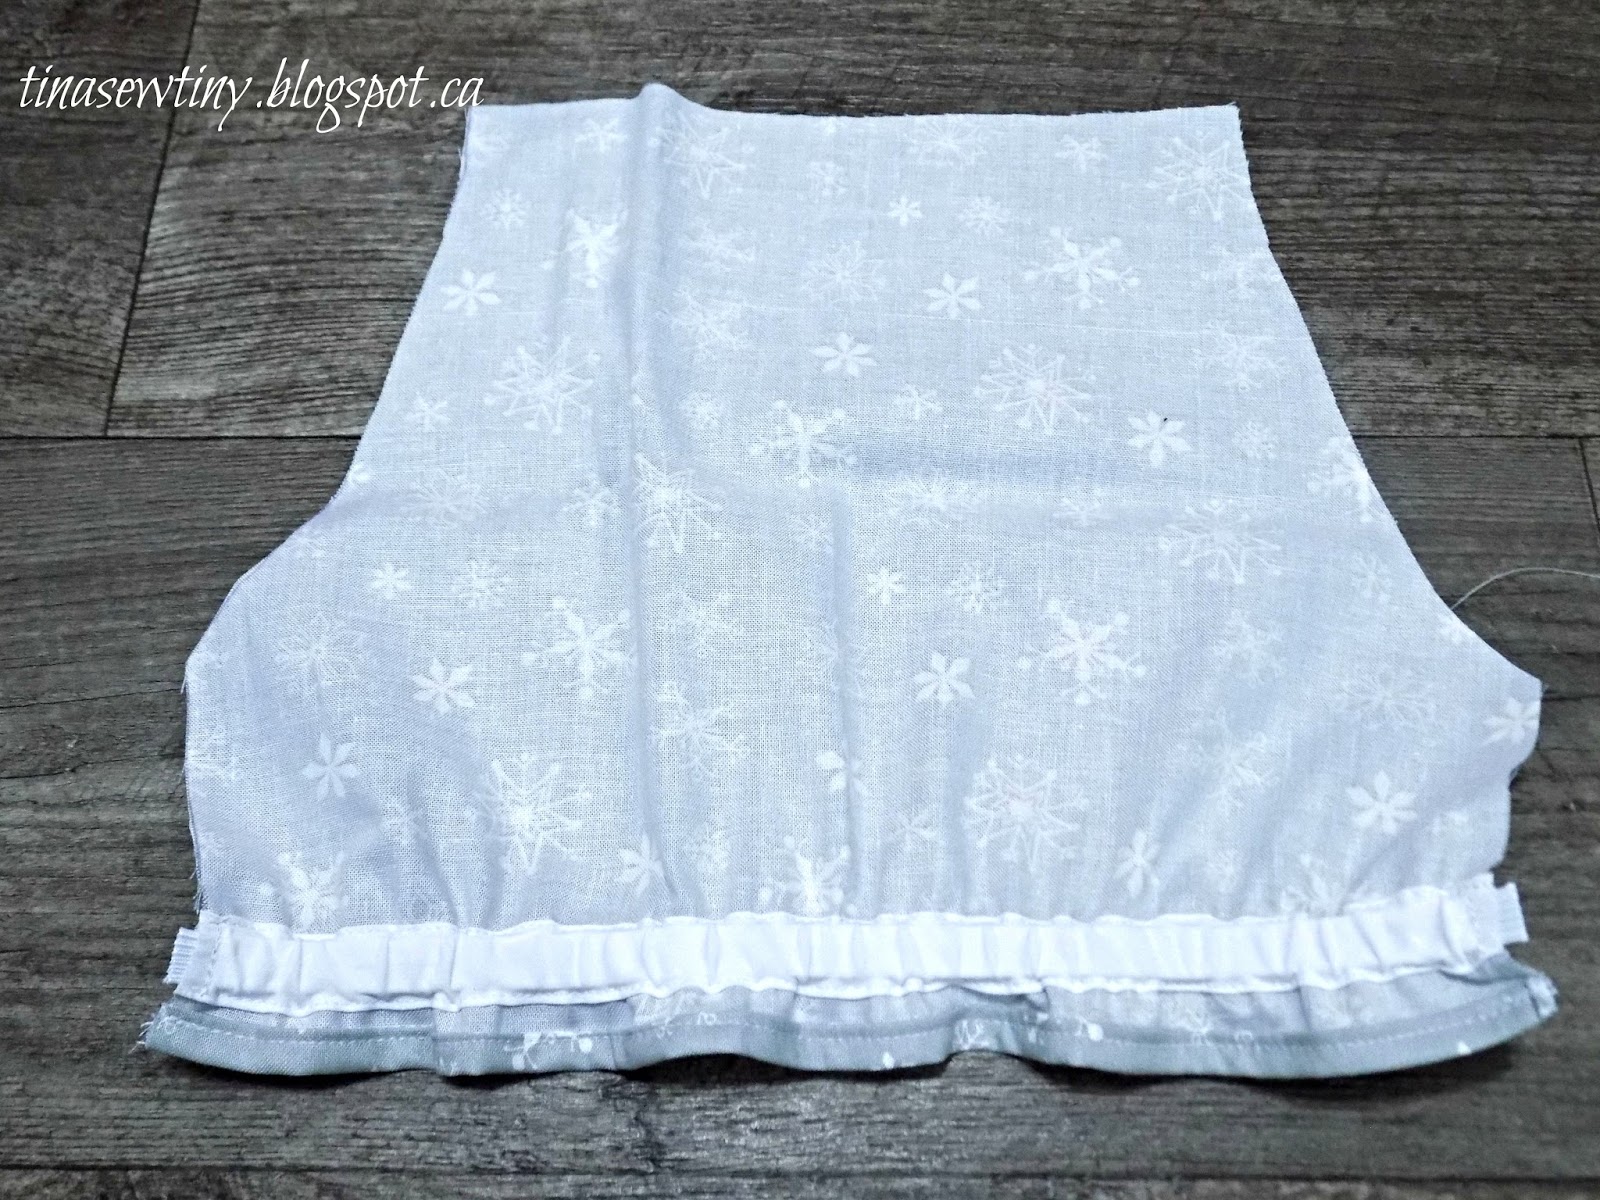
They were so motivated by it, that before I was even up they had their room all cleaned, so that they would have the day free! I was going to tell them to clean it, but I hadn't yet! In fact, they've been so good (knock on wood) that I've had time to sew Hunny up a top! I had it cut out already, and so I set to work sewing it up.
It began as a skirt. One that didn't fit me anymore, and was an awkward length anyway. The fabric had a beautiful drape, but my goodness, was it finicky to work with! I sewed the sleeves in three times, and they're still not perfect, but good enough for everyday wear. This was, after all, a muslin. A wearable one though! Lucky enough, it's black, so it's perfect to hide any flaws in construction.
Unfortunately, blizzard weather also means gloomy skies, and since all my lighting for pictures comes from my windows, that meant poor quality photos. However, that happens generally in winter, where I live anyway.


I used the Love Notions Maggie Peplum, and I just love how it fits on her. I usually have to mash sizes for her, but not really on this one! I went with a size 6, and was surprised that it fit her really well in the bodice. Most of her height is in her long legs, but her torso and shoulders are slim, so I usually end up lengthening size 5 for tops. I did cut the peplum size 6 width, and size 12 length, as I wanted it to hit full hip, and it looked like all the testers hit more around high hip. I find full hip to be a better length for pairing with tights.


Although you can't see these details in these pictures, the peplum top has lovely princess seams, and this version has a pleated peplum, with two pleats that line up beautifully with the princess seams. It can be made with a circle or gathered peplum as well, and includes four sleeve lengths. It also comes in women's sizes, the Love Notions Margot Peplum Top (which can be purchased with this one in a bundle. I did, and can't wait to sew one up for myself!).
It's been a wonderful snow day so far, and I plan on finishing it up with some hot sommerbarscht (sausage and potato) soup for supper with homemade bread, some Christmas activities, and round it off with a good book!
Remember, you can follow me on Pinterest, Instagram and Facebook using the social media icons in the top and bottom left hand corners of my blog. Also my Pinterest Board with all my creations can be found in the bar along the right hand side. If you're looking to purchase or order something from my shop, you can contact me on my page. That's Sweet Stitch Shoppe. I love to hear from my readers, so please leave your comments and questions down below! Thanks for stopping in!

Tuesday, November 22, 2016

November Update

Notice anything... different? Let me know in the comments below if you like it 😍, or hate it 😒!
It's been a while since my last post, and boy, am I feeling it. I don't know if you all know, but I don't make any money from my blog. As in, I'm not even trying to. There are no affiliate links, no ads, nothing that generates any income. Now, that's mostly because I don't think it's big enough to even generate any income, but also because it's something that I love to do, and love the flexibility of being able to blog when I'm inspired, not because I need to. It's much more of a therapeutic process vs a business one.
October was a pretty busy month, what with sewing for the craft show and all. I only made one sale, but it was enough to cover booth fee and gas, and I got to hang out all day with my good friend who shares the table with me, and get inspired by all the other handmade crafters at the venue. I really like this particular show, because it is strictly handmade items, and is the largest show in my immediate area.
Here's a look at our very much jerry-rigged backdrop with top shelf that I made out of pvc pipe, fishing line, cardboard, zipties and a king sized sheet.

I'm really happy with how our table looked! My work is the Pillow beds packaged on the bottom left on the table, the doll sleeping bags near the bottom right on the table, and the 18" and 12" doll tents up on the shelf. My good friend Jeanine, you should check her blog The Crafting Fiend here, makes the dolls, beanies, tea towels and hooded towels. She also designs beautiful FMA patterns at StichArt (which you can purchase here), and lovely custom fabrics for True North Fabrics (which you can purchase retail here or enter pre-oders here). Again, no affiliate links, these are just because I love her work, and I think you will too! Especially if you're looking for someone Canadian in these areas of art.
My daughters absolutely LOVE the pillow beds I made, now I only need to buy a few more pillows so I can stuff both of them, without stealing pillows off of the beds. They are so perfect for reading, lounging and movie nights. Also great for when friends stay over, or to take to Grandma's house!

I also designed some 12" sleeping bags to compliment the 12" tents, so that little girls can make the camping experience for their dolls that much more realistic.


ALSO, between all that sewing, and after the craft show, we renovated our daughters' bedroom! It's not completely redecorated yet, but I'll give some shots of the before and after, to give you an idea of the difference. My decorating is a constant process (not to mention a slow one), so I don't know when I'll have pics of the final decorated space.
Before!

After!

Btw, those are the same beds, just painted white! I think it brightens the room so much. We ripped out the paneling in the closet and replaced it with drywall. I didn't take pictures because although the closet is painted, it has no shelving or hanging rods in it yet. We painted the rest of the room, replaced the ugly carpet with vinyl flooring with a wood print, and replaced the outdated brown trim with new white trim. I also replaced the bedding with thin, minky blankets. I know we're in the north, but our house is always kept the same temperature, and with jammies my girls just found the comforters too warm. My youngest is also super attached to her blankie still, and is transitioning to the big one. Them both being minky makes it easier. I'm not taking her blankie away, I'd just like her to also use her big one, since the small one is just getting too small.
Another thing that I've been working on in the last couple of weeks, is learning how to knit! I'm just beginning my first project ever, which is a cable knit scarf (because knowing me, I can't seem to be satisfied with my first project being an actual beginners pattern. Nope, it has to be something harder...Smh.) Here's a peek at my progress, I'm pretty proud of it!

Lastly, now that it is getting to winter, I"m hoping my sewing will be picking up, although I really need to do some fabric shopping, as most of my knits are gone! My oldest especially needs leggings, as her sz 8's are getting too short, but the waistband is still too wide, so it's time to venture into the land of handmade leggings for her.
That's the roundup of my November, and I hope I can be writing more frequently now! Because really, I forgot how much fun it was!
Remember, you can follow me on Pinterest, Instagram and Facebook using the social media icons in the top and bottom left hand corners of my blog. Also my Pinterest Board with all my creations can be found in the bar along the right hand side. If you're looking to purchase or order something from my shop, you can contact me on my page. That's Sweet Stitch Shoppe. I love to hear from my readers, so please leave your comments and questions down below! Thanks for stopping in!

Monday, October 17, 2016

Back to reality, oh, there goes gravity! Mundane Monday Muttering

I'm thinking this may be the beginning of a new thing. Mundane Monday Muttering, where I just babble about my current events, and current attitudes, which may or may not have some sewing involved. Like? Dislike? Take a peak and let me know in the comments below!
Okay, so I'm back after much too long of a hiatus, and I don't have much to show you. I've been having some trouble with my anxiety lately, hence the hiatus, and got into a bit of a rut. (Because who doesn't love feeling like a hamster in a hamster reel, right?)
So, why the anxiety? Well, it's a big year in the Voth household. I turned 30 this summer, hubs is turning 30 this month, AND it's our 10 year wedding anniversary this month. Poo. Now some of you may be asking, why Poo? Shouldn't this be a year of celebration? And therein lies the problem.
You see, I'm the kinda girl who gets her heart set on something (especially plans she concocts in her own head, can you feel where I'm going with this?) and I had my heart set on something big to commemerate this year of milestones. What I didn't consider in my plannng is my husbands feelings on this. Long story short, it will be a much smaller celebration. I totally set myself up for dissapointment. So yeah, there's my little sob story.
Anyone feeling sorry for me? No? Good, because I think it's time for my pity party to end and for be to put on my big girl panties and get back to adulting. And to make up for having to listen to me whine, here's a pic of me at the age of 20 in my wedding dress, which is a whole nother story.

Which brings me current. To deal with my self inflicted anxiety, (instead of the pity party I indulged in for a couple of weeks) I decided to throw myself into my work in getting ready for my upcoming craft show. So the last two weeks have been filled with cutting fabrics, inventory planning, and even a little pattern drafting! That's right, I drafted my first pattern! It isn't much, and it's only had drawn, but it's all mine!
Here are some pics of some of the cut out items I have finished sewing up.
This tent is the 12" size, and drafted by yours truly! Accompanied by some 12" doll sleeping bags. I'll be sewing up an 18" doll tent in the same fabric tomorrow, and I hope to get some pics of them side by side for size comparison. 
I finally got to put my daughters into a dance class, which I've been dreaming of since my first baby girl was born! My youngest started first, so I couldn't help myself and sewed her up legwarmers to complement her dance outfit. My oldest began later, so I've promised her a pair as well, but I don't have enough minky for her long legs, so I'll have to order some. It works out to the best anyway, since her dance outfit is black and white, and she'd like black ones. Anyway, here are Monkey's pair!
Btw, let me just say, if glitter is the cursed craft supply, minky has to be the cursed fabric of the sewing world. The shedding is crazy! I had a lint roller, duster and vaccuum handy while sewing up these pretty little things!
I went shopping for some flannel for some pillow beds that I'll be sewing up. I"m not making a lot, since I've no idea how they'll sell. My girls are really hoping they won't sell, so they'll be able to keep them, even though I've already told them that if they sell, I'll make them each one after the show is over.

I've got quite the crazy docket lined up for the next few weeks. Some tents, pillow beds, headbands and bookmarks need to be made before Nov. 5th!! Not sure what that'll do to my anxiety, hopefully I'll be to happily busy sewing to worry about any time constraint pressure. Sure feels good to be writing again!
Remember, you can follow me on Pinterest, Instagram and Facebook using the social media icons in the top and bottom left hand corners of my blog. Also my Pinterest Board with all my creations can be found in the bar along the right hand side. If you're looking to purchase or order something from my shop, you can contact me on my page. That's Sweet Stitch Shoppe. I love to hear from my readers, so please leave your comments and questions down below! Thanks for stopping in!


Wednesday, August 24, 2016

At School and Play; a Sis Boom Blog Tour


September is just a few short weeks away, and for us up here in Canada, it means the beginning of school! I'm thrilled (and a little nervous, I'll admit) to be a part of Sis Boom's At School and At Play blog tour. 
Keep reading to the end of the post, as there's a giveaway!
The Sis Boom Leighanna is one of my favourites for several reasons. First, no closures. Second, easy fit. Third, can be sewn in woven OR knit. Finally, it's a really fast sew. This one only took an hour and a half, and that is from cut until finish, plus I forgot to stop the timer when I paused to pull out my eldest's tooth. I had the timer going, because I'm horrible at estimating time. Anyone else?
One thing I did differently this time around, is add elastic to the short sleeves. It is in the pattern, but I've never done it before because both of my girls HATE exposed elastic. So, I decided to add a casing, and include a mini tutorial for you in case you'd like to do the same!
Begin by following the pattern directions until the step where you iron the hem of the sleeves on page 12. Press the sleeve hem as directed, and proceed to the step where it tells you to draw the line with disappearing marker or chalk. Here's where it changes a little.
The pattern tells you to measure up 1 inch above the hem line and draw a parallel line across the sleeve on the wrong side. Instead, measure up 1 1/4 inch, and draw the line. Next, cut two pieces of single fold bias tape the same length as the width of the sleeve. Have double fold but not single fold? No worries, just press it open with an iron, voila, single fold bias tape (that's what I did). Since I used 1/2 inch elastic, I just made sure my bias tape was just a bit wider. If using 1/4 inch elastic, you'll want bias tape that is about 1/2 an inch wide.
Line the bias tape up with the line you drew, between the hem and the line, and edge stitch along the edge of the tape all the way along. Do the same to the other side of the bias tape. Repeat on other sleeve.
Use a safety pin or bodkin to feed the elastic into the casing slowly. Once you've got the end lined up like in the picture, stop. If the end comes into the casing, just feed it all the way through, pull it out and try again. Then stitch down the end, within the seam allowance. I like to give it a couple of runs back and forth, to make sure it's tacked down good.


Then, feed the bodkin/safety pin out the other end and tack that end down the same way. It should look like this.
 

Repeat with the other sleeve, and follow the rest of the directions on the pattern and you're done!
I love how the sleeves look with the little gather, and now my little is actually happy wearing it!
You can get any of the Sis Boom patterns in their shop or their etsy shop and they're on sale RIGHT NOW for 40% off until September 4th using the code BACK2SCHOOL! They've also got a sew-along happening in their Facebook group if you want to join in. Any back to school Sis Boom sews that are sewn between August 1 and September 10 can be entered into the album here. Three winners will be chosen and awarded pattern of choice!
And now for the blog giveaway! Comment below your favourite thing to do in free time (when you aren't sewing) for a chance to win a free copy of the Leighanna pattern. Don't forget to check below for more blog posts with giveaways!
***Edit to Add: This giveaway is closed. ***
Welcome to the Sis Boom Blog tour!

We are excitied to announce that our bloggers EACH have a pattern giveaway on their posts! Everyday something new; so be sure to follow along with this tour!

August 22 Paisley Roots / August 23 Cookies n' Bees  /  August 24 Tina Sew Tiny  /  August 25 Screeching Dinosaur  /  August 26 PearBerry Lane  /  August 29 Troosp To Tots  /  August 30 A Crazy Craft Lady  /  August 31 Glitter in My Coffee  /  September 1 Sunflower Seams  /  September 2 Adventures with Bubba and Bug

Thursday, August 11, 2016

Where I've Been Hiding and Why

All right, I haven't blogged in awhile, and I feel horrible. Not only because I haven't blogged, but also I've been sick most of July and all of what we've had of August. So I haven't really sewn since I made Honey Bee's end of school dress. But I NEEEED to blog, it brightens my mood.
So, aside from being sick, I'll show you what I HAVE been doing!
To begin with, we went camping, which I LOVE! Unfortunately we live in the land of bird sized mosquitos that breed by the thousands (ok, I might be exagerating by a little bit, but not in the numbers!). However that didn't stop us from taking at least one camping trip with our cute little pop up that I'm DYING to redecorate! Hubs says to leave well enough alone, so I'm waiting... for now, lol. (apparently I'm horrible at taking photos during a camping trip so I had to dig these up from last year, I blame dear husband, he thinks pictures are overrated and hates being in them. I therefore find it a suitable punishment that he is in the top pic, and featured on my blog, lol. Don't worry, I assure you that we love each other.)
I did find one current pic of my girls enjoying the outdoors though! Horrible quality, though.
Also, they've had some great times in the backyard, which is surprising really, as their options are really limited at the moment. Thank goodness they've got great imaginations!
At least they love summer. I, on the other hand, do not. (Aside from camping, I love camping and I never understood why since I generally don't like being outdoors. Maybe it's the stress free, devil-may-care approach that we take. The possibilities are endless on a Voth camping trip. Roasted marshmallows for breakfast? Sure why not? Impromptu trip to a nearby water park? Absolutely! Lazy afternoon naps with no regard to bedtimes? A must! Clocks and basically any technology don't exist on our trips. We have a pop-up camper, but we never have water hookup, and have yet to use the stove. We bought it so my post baby body had somewhere soft to sleep, my hips never really did recover from the whole loosening joints bit. Ok, side ramble over, back to the blog!)
You know how some people are affected by winter, it's a seasonal disorder, and their productivity drops? Yeah, that's me in summer. We've got two months of warm up here in Manitoba, and my anxiety spikes when I've got this giant to do list that needs to fit. For example: gardening, pool/beach trips, camping trips, fall capsule sewing, back to school prep, canning/freezing garden results, housecleaning, the way that summer somehow multiplies the amount of dirty laundry etc. Throw in having both girls at home all day everyday and wanting to make some memories with them, AND sicks days, and the schedule is FULL.
Did I forget to mention the complete bedroom overhaul we're doing for the girls? Yes? Well, that's a whole-nother (why does that word sound just fine spoken, but I can't for the life of me figure out how to write, or if it can even be written properly?) blog post coming up. Whenever we finish. Which is hopefully before school starts because the girls are sleeping on their mattresses on the living room floor atm, and are getting less sleep because of it. I can show a picture of how the room USED to look though. (These pics are from the beginning of last year, because apparently I didn't take proper before pics. Well, it looked exactly like this when we started renos, so I guess it's good enough.)
Builders grade paint, tacky 80's ish lighting, and REALLY tacky shag rug. Blech! We're keeping the beds (they were my sister's and mine back when we were kids) and the rest of the furniture, but the room is getting everything new. What's not pictured is the tacky closet complete with plywood paneling interior. Stay tuned for finished results! They WILL come! (after all, the girls can't sleep in the living room forever, I forbid it. The clutter is driving my NUTS! Can you tell?)
And thus comes to end my super rambling, way too chatty without enough pictures answer to where I've been hiding this summer and why! Hope you enjoyed! If you didn't, I'm totally cool with you marking this post as read and moving on, lol. Just keeping things real here, because that's how I like them! :) 
Remember, you can follow me on Pinterest, Instagram and Facebook using the social media icons in the top and bottom left hand corners of my blog. Also my Pinterest Board with all my creations can be found in the bar along the right hand side. If you're looking to purchase or order something from my shop, you can contact me on my page. That's Sweet Stitch Shoppe. I love to hear from my readers, so please leave your comments and questions down below! Thanks for stopping in!


Tuesday, July 12, 2016

Sally Dress with Circle Skirt - Dressing it up


Can I just start with saying how incredibly antsy I've been, having to wait almost two weeks to share this dress? With my computer at the techs, and my back up crashing, my only option was to wait until I got my desktop back before I could post.
This dress began when I decided two days before my oldest daughters grade transition ceremony to make her a new dress for the celebration. My youngest had a new dress for her Pre-K graduation, and I had this darling idea in my head for a Sis Boom Sally party dress. So I got to it!
This dress has a couple of firsts in it. First time using a lace overlay, first time ruffling tulle with my serger (saved me at least two hours work, since the tulle was 4 meters long, two meters long ruffled, only took me 15 min, cutting included!!), and first time doing a rolled hem with my serger! None of these will be the last either.
I began with a cotton broadcloth for the base of the bodice, as well as the bias tape (note to self, I should really invest in some bias tape makers). I then basted the lace overlay pieces to the cotton broadcloth pieces, and treated them as one piece. Then followed pattern instructions until I came to the skirt.
For the skirt, I cut one half of a large circle skirt from this cute waffle knit that I had been hoarding. It has very minimum stretch, so I just treated it like a woven. I cut the waist circle wider than the bodice waist, so I could add two box pleats.
The back was trickier, since I did a hi-low skirt. I began with sketching out the circle skirt same as the front, then I simply marked how much longer I wanted the back at the bottom along the fold. Then I freehand re-drew the circle, blending it from the the first circle to the second, if that makes any sense at all? The back circle has two pleats, just like the front.
I finished the skirt with a rolled hem, which isn't perfect, but good enough for me, and definitely better than I thought I'd do for the first time! 
For the tulle, I cut four inch wide strips of tulle, as long as the piece that I had, which was about 1 meter wide. I then set my serger settings to the following: Differential feed at 2, stitch length at the usual 3, stitch width (cutting blade width) at the usual 6, knife on. For the dials, I had them set at 7, 5, 4, 4. On my serger, that ruffled tulle down to half of the cut size. It would be different for different sergers, or fabrics. I just played with settings, until the practice strips became half the length that I cut them.
Then, I drew a line about 2 inches from the edge of the skirt on the wrong side. I lined up the serged edge of the first tulle piece, and sewed it on along the line. When I got to the end of the first tulle piece (I had three for the front, and four for the back), I took the next piece, overlapped the end of it with the end of the first piece, and continued sewing it on along the line. Easiest tulle ruffle I've ever done!! Obviously, if it was fabric, I would first sew the ends right sides together to make one long ruffle, so that the seams were finished and hidden, but with tulle there was no need, since the type of tulle I was using doesn't fray.
As a final touch, I used bias tape on the bodice to make a design instead of having a sash. It's not perfectly symmetrical, but again, I'm happy with it.
I'm so pleased with my results!! My daughter loves the dress, and my youngest has been begging for a similar dress ever since! The Sis Boom Sally is the perfect pattern for this. With an elastic back, but still full coverage bodice, it is an easy and quick sew. You'd think without closures and it being woven you wouldn't get a good fit, but the way the elastic pulls it in gives it a nice and fitted look, while still allowing little girls to dress themselves.
I'd love to get right back to sewing, but we've decided to redo my daughters' bedroom, so some of their stuff has taken over my sewing room. I'm hoping it won't take too long, as I'd like to write my next post about it. There'll be some sewing projects involved, such as curtains, cushions and hopefully some wall art! I guess we'll see! I've always wanted to design a room for them, and I've finally got an opportunity. Unfortunately, I also have a small budget. Oh well, better some than nothing!

Remember, you can follow me on Pinterest, Instagram and Facebook using the social media icons in the top and bottom left hand corners of my blog. Also my Pinterest Board with all my creations can be found in the bar along the right hand side. If you're looking to purchase or order something from my shop, you can contact me on my page. That's Sweet Stitch Shoppe. I love to hear from my readers, so please leave your comments and questions down below! Thanks for stopping in!

Monday, June 27, 2016

Regularly Taking Measurements; Featuring a Knit Tortola

Well that's it! Today marks the three week anniversary of illness in this house, and I'm sooo ready to be rid of it. I've been doing nothing but cleaning, sanitizing, and lots of cuddling over the last three weeks. First week it was me, next was my oldest, and my youngest is currently still recovering (knock on wood!).
Somehow, I managed to sneak in a little sewing time here and there to boost my mood after a day full of cranky kids. I'm glad I did, Mommy needs to be sane to care for her littles, right?
So, I've been working on losing some weight lately, and trim out my shape. Can I let you in on a little secret? I admit doing a little happy dance when the flu I had brought my weight down about 10 pounds. After all, if I'm going to be sick, at least one good thing came out of it, right?
So, I was about to start a new project, and I thought to myself, I probably didn't lose any inches, but eh, what the heck, let's measure. So I did, and BOY was I glad I did! I went down almost TWO sizes in the Tortola!!! I was on the larger end of the large, now I"m on the smaller end of medium! I did this one in a small upper, graded up to a medium hips, but it's in a 25% stretch knit, and it's fairly snug, so I'd go with a straight medium for a woven. I added some darts in the armscye, because I forgot to shorten the straps slightly, and as a result, the armscye looks a bit tight. However, it's not uncomfortable.
I did a bias tape finish instead of facings, since it really bugs me if the facing wants to peek out. It was a little tricky, but in the end I conquered it, and got a nice neat finish.
Also, I made it a smidge shorter than I like, so I added a three inch band at the bottom. Bonus part? That meant no hemming!

I wish I had more pictures, but I've got to rely on me, myself and I for photography, and the self timer. It's just really hard to think of poses and try to be animated when I'm outside taking selfies, lol.
I'm super thrilled with this new top! I'm also super thrilled to be done, because I'm giddy with anticipation about my next project!! As some of you know, I'm on a Fabric diet until I've sewn most of what I have (which, I assure you, is not a lot by the standards set by Facebook sewing ladies!). My husband and I are not the hoarding type, and I tend to shop per project usually. One of my biggest fears is buying fabric and never using it, therefore the money going to waste that was spent on it.
I'll admit it, Hubs and I are both pretty tight with the penny (or nickel I guess, since pennies are extinct here, lol).
Anywho, back to my anticipated project. I'm not going to leave any hints as to what it is, but I think it'll be GORGEOUS!! I love pretty clothes!
Do you have a guess what it'll be? Leave it in the comments below! Don't be surprised if I don't confirm or deny any guesses though!
Remember, you can follow me on Pinterest, Instagram and Facebook using the social media icons in the top and bottom left hand corners of my blog. Also my Pinterest Board with all my creations can be found in the bar along the right hand side. If you're looking to purchase or order something from my shop, you can contact me on my page. That's Sweet Stitch Shoppe. I love to hear from my readers, so please leave your comments and questions down below! Thanks for stopping in!

Monday, June 6, 2016

Make Laundry don't do Laundry... Patterns for Pirates Layer Me Up Shirt


I was really excited when I heard about the Make Laundry don't do Laundry blog tour that is happening right now! Who wouldn't rather sew than do laundry, right? Especially if the project takes less time than it takes to wash and dry a load. I'm excited to read all the blog posts along the way.
Did I mention they've got prizes? Just go to one of the participating blogs, like this one right here by my friend Jeanine over at The Crafting Fiend, and down at the bottom is a raffle copter where you can enter. Want to participate? You can add your own blog post like I am at the link up also at the bottom! Now everyone can get in on the fun!
Once I decided I wanted to join in the link up, I knew right way what I wanted to sew. I had this practically brand new maternity dress, with fabric that I loved. The only problem was the fit, and the fact that I wasn't pregnant, and probably won't be again. So I decided to upcycle it into something I'd actually wear and love.
I had just bought Patterns for Pirates Layer Me Up Shirt pattern, but I knew I'd have to alter it before it would fit me, seeing as I'm 5 feet tall, and the patterns are drafted for someone 5 ft. 6 inches tall. Yeah...I'm short...and I'm okay with that, lol. So after shortening the pattern an inch in the armscye, and another 3 inches in the torso, I was ready for my first try! The neck binding gave me some fits, but that was my problem, I'm still learning how to sew knits, but I LOVE how it turned out!
I didn't even have to hem, since I used the original hem of the skirt of the dress. Total time for this project from start to finish was an hour and 15 min, and would've been less had I nailed the the neck binding on the first try (like I did with the armscye binding) instead of the fourth. Well, practice makes perfect!
I spent all morning with the self timer in my front yard trying to get pics, it's rainy, windy and cold! I did manage to get a couple of decent ones in the bunch. I also got some weird stares from the neighbours, whom I'm sure think I'm very obsessed with selfies, lol!
I can't say enough how happy I am that I stuck it through when I was beginning to learn how to sew. It often got discouraging, but it is sooo worth it! Having clothes that fit right has done wonders for my self esteem. When clothes don't fit right, they don't look good. Now I'm off to sew me some more for my wardrobe! It's in desperate need of some new pieces.
Remember, you can follow me on Pinterest, Instagram and Facebook using the social media icons in the top and bottom left hand corners of my blog. Also my Pinterest Board with all my creations can be found in the bar along the right hand side. If you're looking to purchase or order something from my shop, you can contact me on my page. That's Sweet Stitch Shoppe. I love to hear from my readers, so please leave your comments and questions down below! Thanks for stopping in!

Wednesday, June 1, 2016

All the Rage Raglan meets Freezer Paper stencil!


I was super excited to have some knit to finally make the SS Raglan. It's actually suppose to fit more like a pull over sweater, but I wanted a fitted long sleeve tee for my youngest for winter. So I sized down one size, measured her arms and torso length, and customized the length of the pieces. I got it all cut out, and then my enthusiasm fizzled and it lay in my unfinished projects drawer for a couple of months. (So much for having it done for Winter, lol) Don't get me wrong, I LOVED the raglan pattern and I could have  just sewn it up, but it was cut from simple grey knit, with no print. Kinda blah.

I used to stencil fabric as a teen to customize my clothes. I grew up with 4 siblings, in a household where we had to penny pinch. Not that we were poor, we always had enough to cover our needs, and a little fun on the side, but brand name clothes were not an option. Heck, brand new clothes were rarely an option. I got pretty good a thrift shopping though!


So when I saw the tutorial in One Thimble issue 11, I knew I had to get back into it! The tutorial was perfect to help me figure things out. After all, my teen years are a ways behind me! Deciding what theme to stencil wasn't very hard. Because of where we live, and also because of my thrifty upbringing, custom fabrics will probably never find their way into my house. And being a member of many fandoms, that made me a little sad. I want my girls to have cute, geeky clothes.


So, I googled some images, traced my favourite onto freezer paper and got creative! Now, the shirt isn't boring at all, but still neutral enough to match almost anything! (Don't worry, my girls have plenty of colourful clothing, hence the need for at least one or two neutral items.)
I have to say I love the result!

I have to add that this quote suits her perfectly. She's quite a handful, and not in that noisy, bouncing off the walls kind of way either. Nope, she's a little curious minx, who likes to experiment with cause and effect, likes to explore, and has an independent, albeit quiet, personality. She keeps me on my toes that's for sure, and I wouldn't have it any other way.
Neither of my girls know who Harry Potter is, but, trust me they will! Whether they love the books as much as I do is up to them, I'm just satisfied knowing they love books already!


Remember, you can follow me on Pinterest, Instagram and Facebook using the social media icons in the top and bottom left hand corners of my blog. Also my Pinterest Board with all my creations can be found in the bar along the right hand side. If you're looking to purchase or order something from my shop, you can contact me on my page. That's Sweet Stitch Shoppe. I love to hear from my readers, so please leave your comments and questions down below! Thanks for stopping in!